Design Director Chris Larson shares quick tips and shortcuts for communicating spatial ideas.
In this, the second installment of our sketching series, we focus on a “how to” process of laying out spatial ideas with some quick and easy tools. While we are fortunate to work with some amazing technical visualization tools, including Revit, point cloud scanning, and virtual reality, it can be equally important to visualize your concepts at inception without the use of these tools. With just a pencil and trace, you are free to put on paper quick sketch ideas to test your concept.
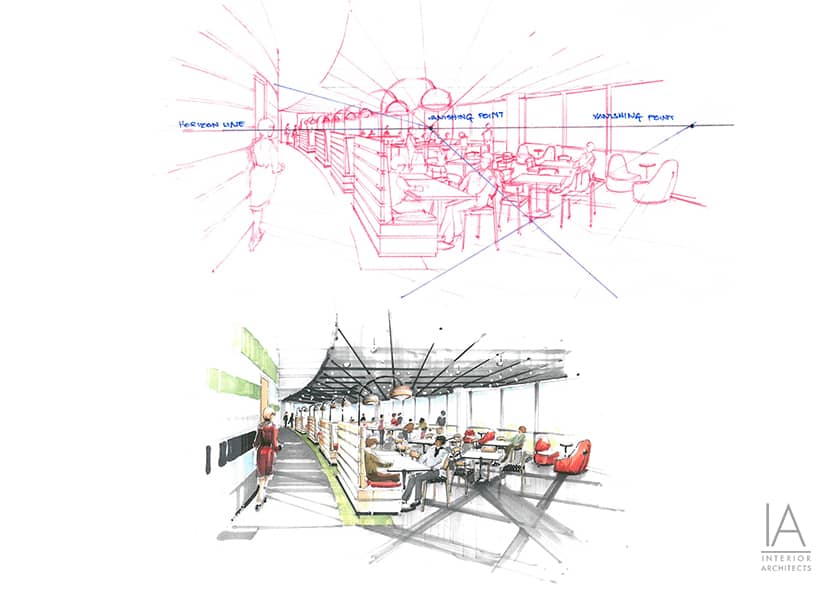
Sometimes, it’s fun to quickly sketch without following the rules. Sketching to get an idea out of your head and on paper is the first step in realizing a spatial idea. That first scribble will talk to you, tell you what it can look like and how it can be manipulated and developed. But first things first: You must get it out of your head and on paper. Then, you can give that rough sketch some accuracy with these simple steps to make it more realistic. What follows are some simple tools of perspective that can get you started.
Play the Game
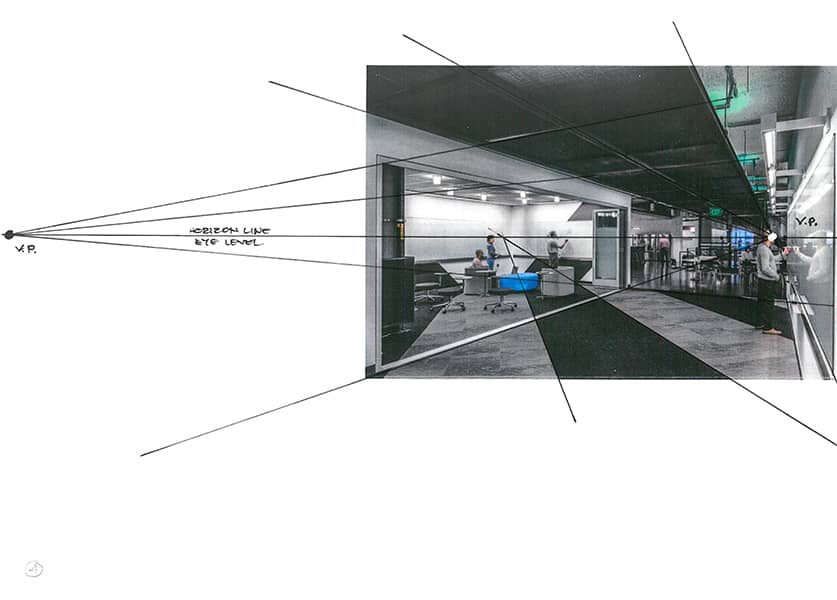
When I see a particularly effective photo of a striking interior, I like to understand what makes the composition so dynamic: I play a game called “find the vanishing point.” Find two lines that seem to converge in the photo, and the point where they intersect. This could be in a floor tile pattern, a ceiling grid, or a millwork theme. Once you’ve found a vanishing point, draw a level, horizontal line though that point, or the eye level at which the photo was taken. All items in the photo will vanish to some point along this line.
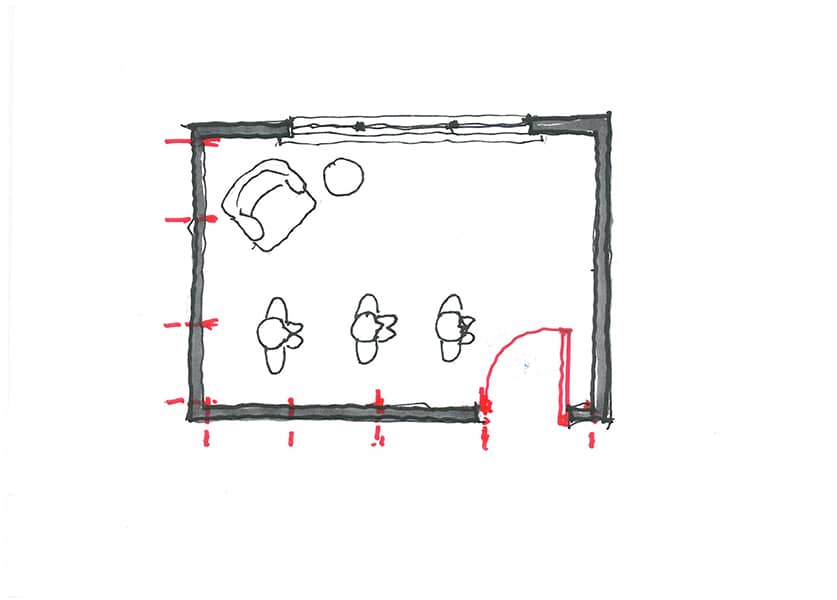
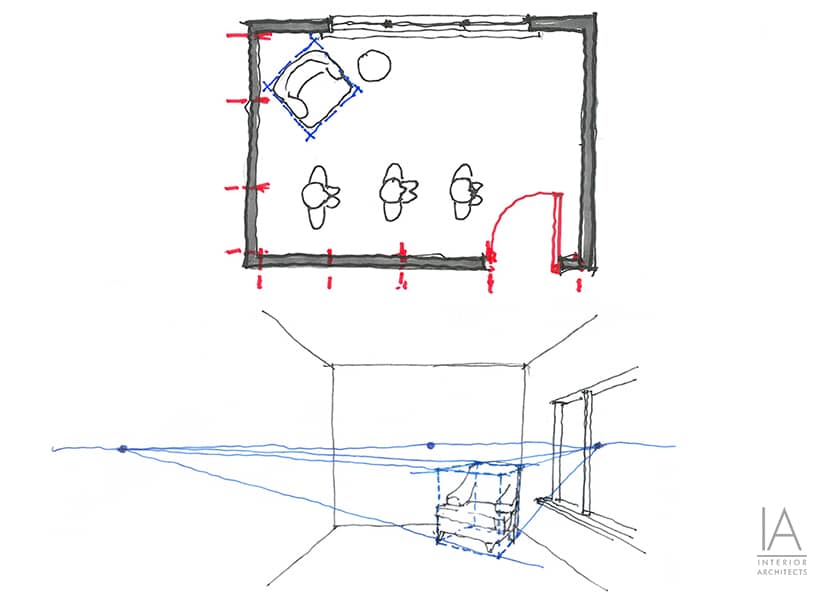
All you need is a floor plan—not necessarily to scale—some type of reference to vertical height, and an idea of what you want to see or highlight. If you don’t have scale or dimensions but you do have a door in the plan, use the dimension shown of the door (approximately three feet) to mark the overall scale of the room. Here, the room is approximately 9 feet by 12 feet, or 3 doors wide by 4 doors long. What you want to see or highlight depends on whether you select a one point view or a two point view. A quick thumbnail sketch can help you decide.
Depth of Field
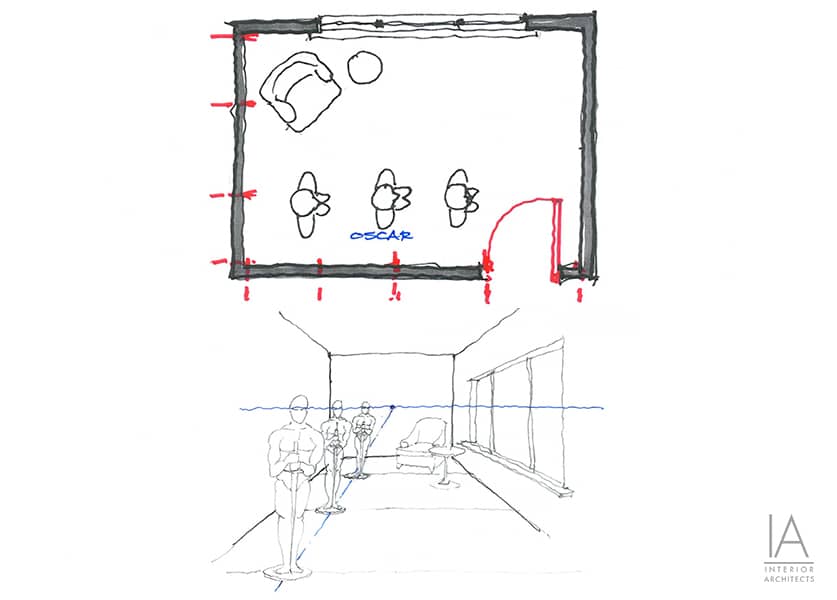
How do you determine how big or small to make items in your room? See how “Oscar” can provide you the answer. He is 5 feet tall and the horizon line runs through his eyes.
Put it in a Box
As I mentioned above about the horizon line of a photo, all items in the photo vanish to some point along this line. To render items in your plan in correct perspective, put them in a box. The item most likely does not vanish to the point where the room vanishes, as it is not parallel to one of the lines of the room but sits obliquely in the room. Put the item in a box where you can project the lines of that box back to the horizon line, and you’ve established another vanishing point. All other items in your plan that are parallel to this item should vanish to the same point.
So, happy sketching and have some fun! The more you do it, the better you will get.